
Use EasyFrame to add a nice finishing touch to your photos.
Using EasyFrame is as easy as 1-2-3:
|
EasyFrame comes with a collection of built-in frames. It also allows you to add and use your own frames. A frame can be an 8-bit grayscale image or a 32-bit RGB with alpha image. Visit http://www.yellowmug.com/easyframe/freeframes for more free frames.
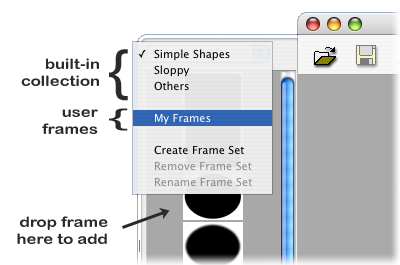
To add a frame, first select a frame set to add it to. Then drag a frame file and drop it in the the frame selection area. (Note: frames can only be added to custom frame sets)
To create a new frame set, click on the frame set selection menu and select Add Frame Set.
To remove or rename an existing set, first select the set. Then click on the frame set selection menu again and select Remove Frame Set or Rename Frame Set.
| Visit YellowMug | E-mail Us |